


April 27th, 2020
Write Tests! How to Make Automated Testing Part of Your Rasa Dev Workflow
Karen White

Compared to the excitement of shipping a new feature, software testing doesn't always get the same kind of love. But while it's sometimes overlooked, testing is an important part of releasing software that behaves the way you (and your users) expect.
At Rasa, we're on a mission to give testing the respect it deserves. We believe that while AI assistants have come a long way in recent years, there's still a big gap between the way many product teams build other types of software and the way teams build AI assistants. We want to make engineering best practices like version control, CI/CD, and yes-testing-the de facto standard for building AI assistants. To that end, we've recently released updates to Rasa Open Source, Rasa X, and our documentation to make testing the easy default when building AI assistants with Rasa.
In this post, we'll explore what testing looks like in the context of building an AI assistant, how to run tests with Rasa, and how to incorporate testing into your CI/CD pipeline. The end result? Less time spent chasing down bugs and more reliable updates to your assistant.
Testing Overview
Before we cover tests that are specific to Rasa and machine learning, let's first take a broader look at testing in software development. Put simply, when you test software, you're making sure the changes you're introducing a) do what they're supposed to do, and b) haven't broken anything else in the application.
In this post, we'll focus on automated testing. Whereas manual tests require a human to evaluate the software by actually using it, automated tests typically run on a CI/CD server after changes are checked into an application's Git repository. Automated tests don't completely erase the need for manual tests, but they do identify a significant number of bugs before they reach production, without additional human effort.
Types of Tests
Software tests follow a hierarchy, moving from granular tests that assess small pieces of code, to higher level tests that evaluate how the entire system works together.
Unit tests
Unit tests evaluate the smallest and most specific pieces of code, usually individual functions or methods. As an example, imagine a function that calls an API to get the latest currency conversion rates and then converts an amount in Euros to USD.
To make sure it works, we would write a unit test, a second function that checks to be sure the first function is returning the expected value. We start with a known input, of say, 12 Euros. Unit tests are performed in isolation from other systems, so we can't call the real API to get the conversion rate. Instead, we supply a mock value, say a rate of 1.10. The unit test feeds these values into the function and then verifies the output against the known value that should be returned-13.18 USD, in this case. You could say a unit test works by asking a function a question it already knows the answer to.
Integration tests
Integration tests operate at a higher level than unit tests, by evaluating how parts of the application work together. However, they don't test the entire application. An integration test typically tests just one feature set or workflow, for example, whether a user can log in to their account.
Functional tests
Functional tests sit one layer higher than integration tests. Functional testing checks how the entire application performs, with all of the pieces working together. Automated functional tests are often run by simulation software because they involve testing the GUI. For example, those who build web-based applications might be familiar with tools like Selenium, which automates actions in the browser.
Tests in Rasa
We've talked about tests in the traditional software sense, but next we'll discuss tests that are specific to Rasa. Instead of testing whether a function returns the expected output or whether a UI is glitchy, these tests measure whether the machine learning models are making correct predictions.
A quick note on terminology: In machine learning, we have the concept of a test set, a portion of labeled data held aside from training to measure the accuracy of the model's predictions. This technique isn't related to software testing, in and of itself. We'll discuss test sets in greater detail when we cover testing the NLU model.
The Rasa tests we'll discuss in the remainder of this blog post can be run as part of an automated CI/CD pipeline, and they measure an important aspect of your assistant's performance: how accurately the machine learning models are classifying the user's message and predicting the bot's next action. We'll also cover checks you can automate to validate the format of your training data files.
For complete test coverage across your entire application, you'll want to explore other types of tests as well. Custom actions can be tested using unit and integration tests (find more resources on writing tests in Python here). For functional testing, you can check out simulators like Botium, which is designed specifically for testing chatbots and voice assistants.
Data Validation
Before you measure the performance of your models, you'll want to be sure the data you're using to train is free of errors. To check your training data for errors and conflicts, run the command:
rasa data validate stories --max-history 5This surfaces errors in your training data files, like a training example that appears under more than one intent. Adding the `stories` positional argument and the `--max-history 5` flag runs the story structure validation tool in addition to checking the NLU, domain, and story data files.
The story structure validation tool checks for conflicting stories in your training data. Stories are considered to be in conflict when they have the same conversation history (going back the max history number of conversation turns) but specify different bot responses. When this happens, Rasa can't learn the correct next action to take. For example:
## Story 1* greet  - utter_greet* inform_happy  - utter_happy  - utter_goodbye
## Story 2* greet  - utter_greet* inform_happy  - utter_goodbye
NLU
The NLU test command evaluates the NLU model's ability to extract entities and correctly classify intents. There are 2 methods you can use to test your NLU model: splitting your data into training and test sets, and using cross-validation.
Splitting a test set
A test set holds back a portion of training data when training the model. The labeled data that's set aside is used as a benchmark to measure how well the model generalizes in comparison. The data in the test set is selected so it's a representative sample, that is, contains the same proportion of intents as the data used to train the model.
To split your data into a test set, run this command:
rasa data split nluYou can then evaluate the model against the test set with the following command:
rasa test nlu -u train_test_split/test_data.md --model models/nlu-20180323-145833.tar.gzCross Validation
Cross validation is another technique for testing how well the NLU model generalizes. When you use the method described in the previous section to split a test set, a portion of your training data is never used to train the model (because it's reserved for testing after the model has been trained). Cross validation trains (and tests) the model on your entire data set. Here's how:
A cross validation test specifies a number (k) of folds that should be used to evaluate the model. By default, Rasa sets the number of folds to 5. The training data is split into k number of groups, which are of equal size. One group is held out as a test set, and the remaining groups are used for training. During each fold, a model is trained on the portion of the data set aside for training, its performance is evaluated by comparing to the test set, and then the model is discarded. During the next fold, a new group of data becomes the test set. Five folds later, every group of training data has had a chance to be the test set, and five models have been trained (and discarded). The model's performance is measured by taking a sample of all the model scores.
Run a cross validation test with this command:
rasa test nlu --cross-validationEnd-to-End
End-to-end tests get their name because they measure how well the models generalize on the entire conversation. Using a test data format called end-to-end stories, this method evaluates both the NLU model and the dialogue management model.
A proper end-to-end test set should represent the kinds of conversations your assistant actually encounters. Including an exhaustive set containing every possible NLU example or dialogue turn is less important than making sure your test set covers the most common types of conversations your assistant encounters in real life. This ensures your assistant behaves in a predictable manner for the types of user flows you intend to support. For that reason, we recommend using Rasa X to generate test stories from real conversations, which we'll discuss in greater detail below.
Note that unlike the story format used for training, end-to-end test stories also include the full text of the user's message.
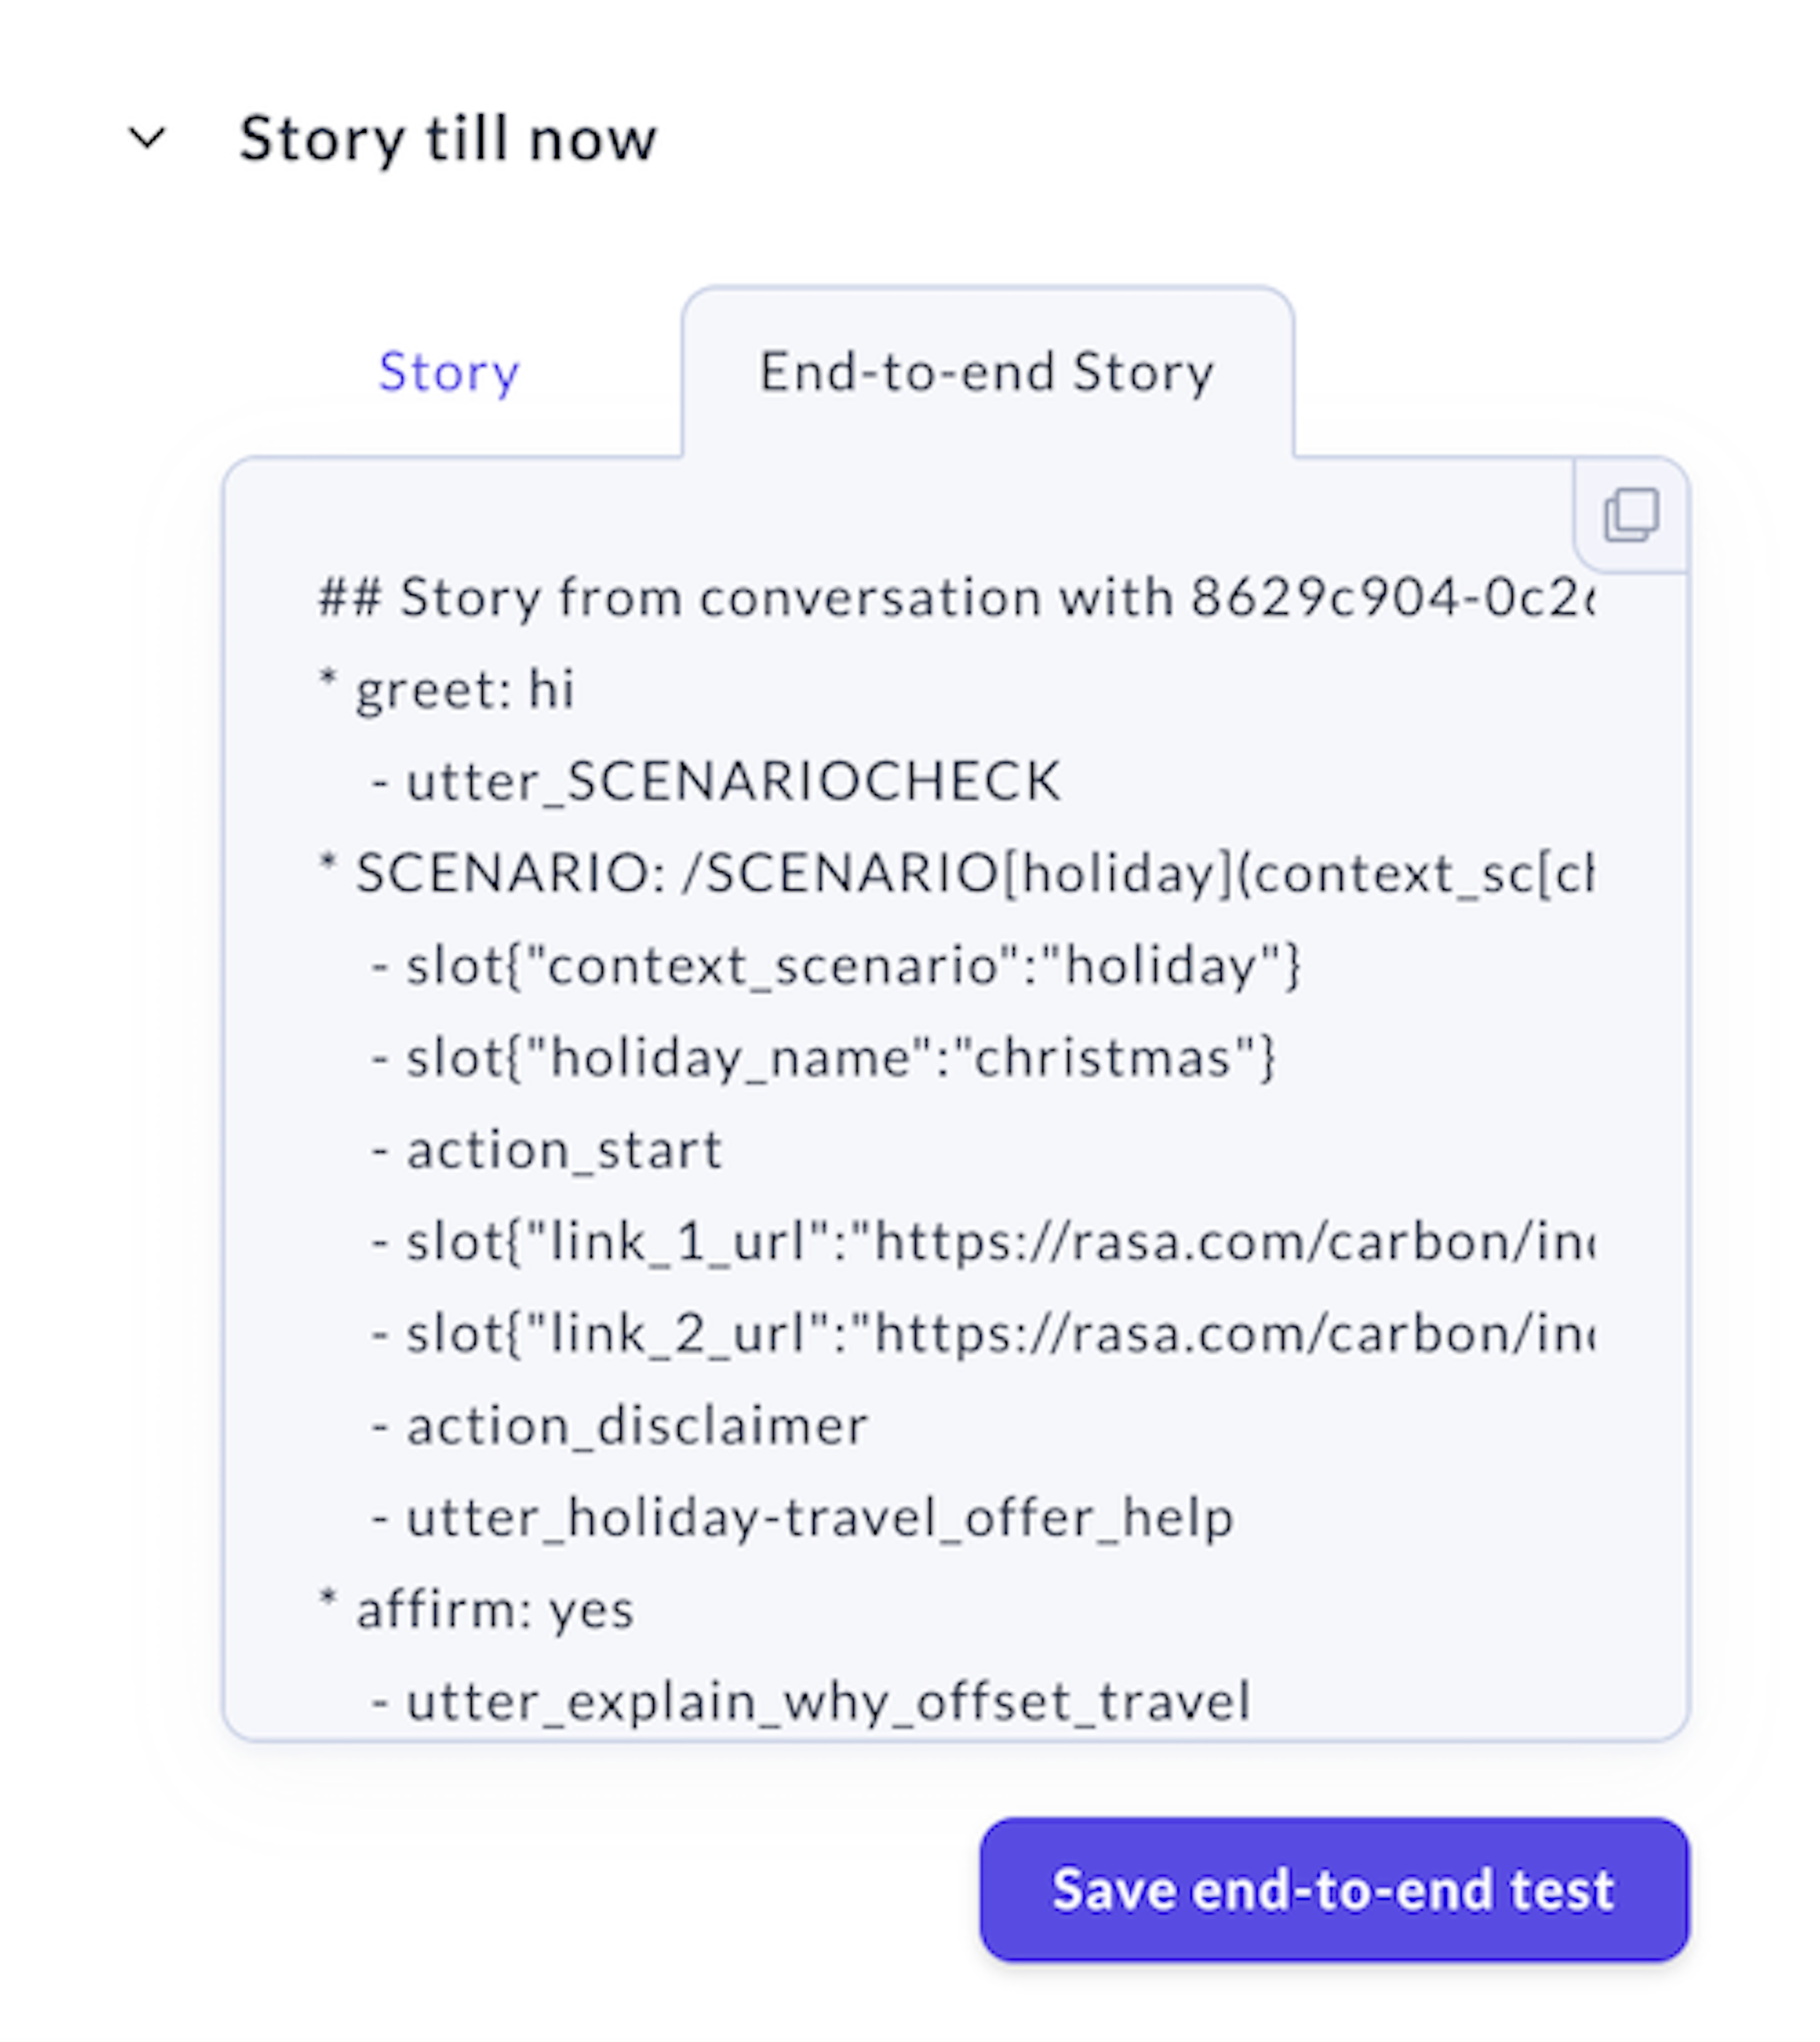
## A basic end-to-end test* greet: hello - utter_ask_howcanhelp* inform: show me [chinese](cuisine) restaurants - utter_ask_location* inform: in [Paris](location) - utter_ask_priceTest stories in the end-to-end format should be saved to tests/conversation_tests.md. With Rasa X version 0.27.0 and above, you can easily save conversations to this file as you review them. When you find a conversation that went well or makes a good test case, highlight it in the center panel and then click Save end-to-end test in the End-to-end Story tab. You can also save test stories in the end-to-end format from the Interactive Learning screen, when you're writing your own test cases.
Once you've collected a few stories in the end-to-end format in the conversation_tests.md file, you can run the rasa test command to evaluate your NLU and dialogue management models.
Interpreting Test Output
The testing methods we've discussed output metrics and graphs to help you understand how well the model performed. But we need to understand what these metrics are telling us, in order to tell whether the tests were successful or not. Let's discuss a few of the most important.
F₁, Precision, and Recall
The F₁ score is a way of measuring a model's accuracy on classification tasks. It takes into account two metrics: precision and recall. To get a better idea of how precision and recall are calculated, we'll explore both using a simple classification task as an example: identifying user messages as intent:greet.
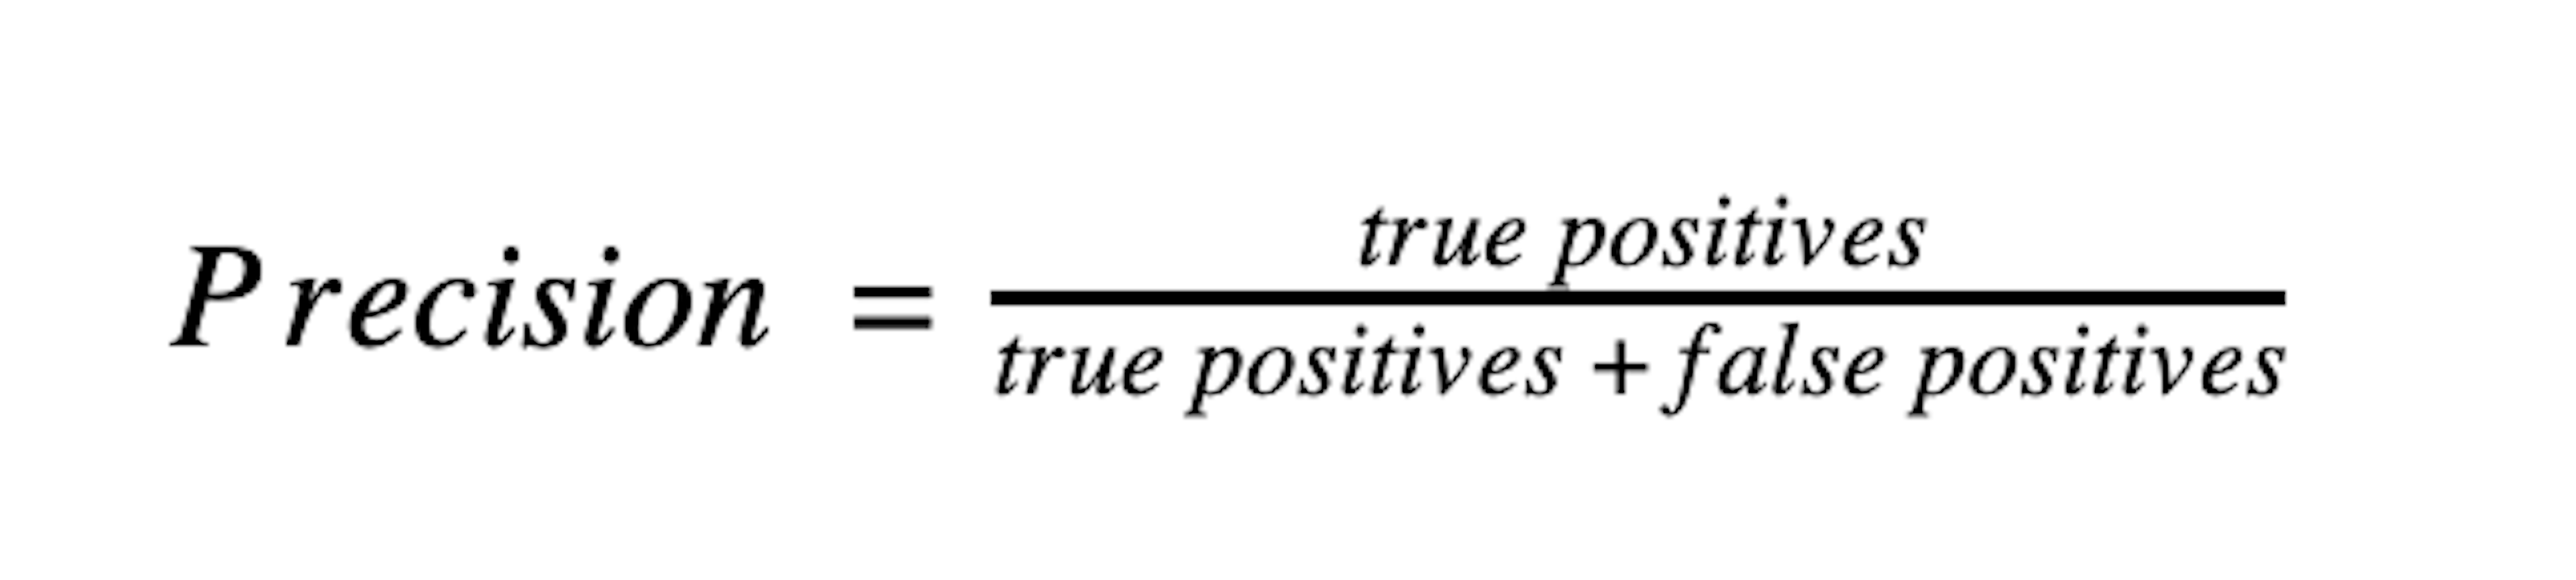
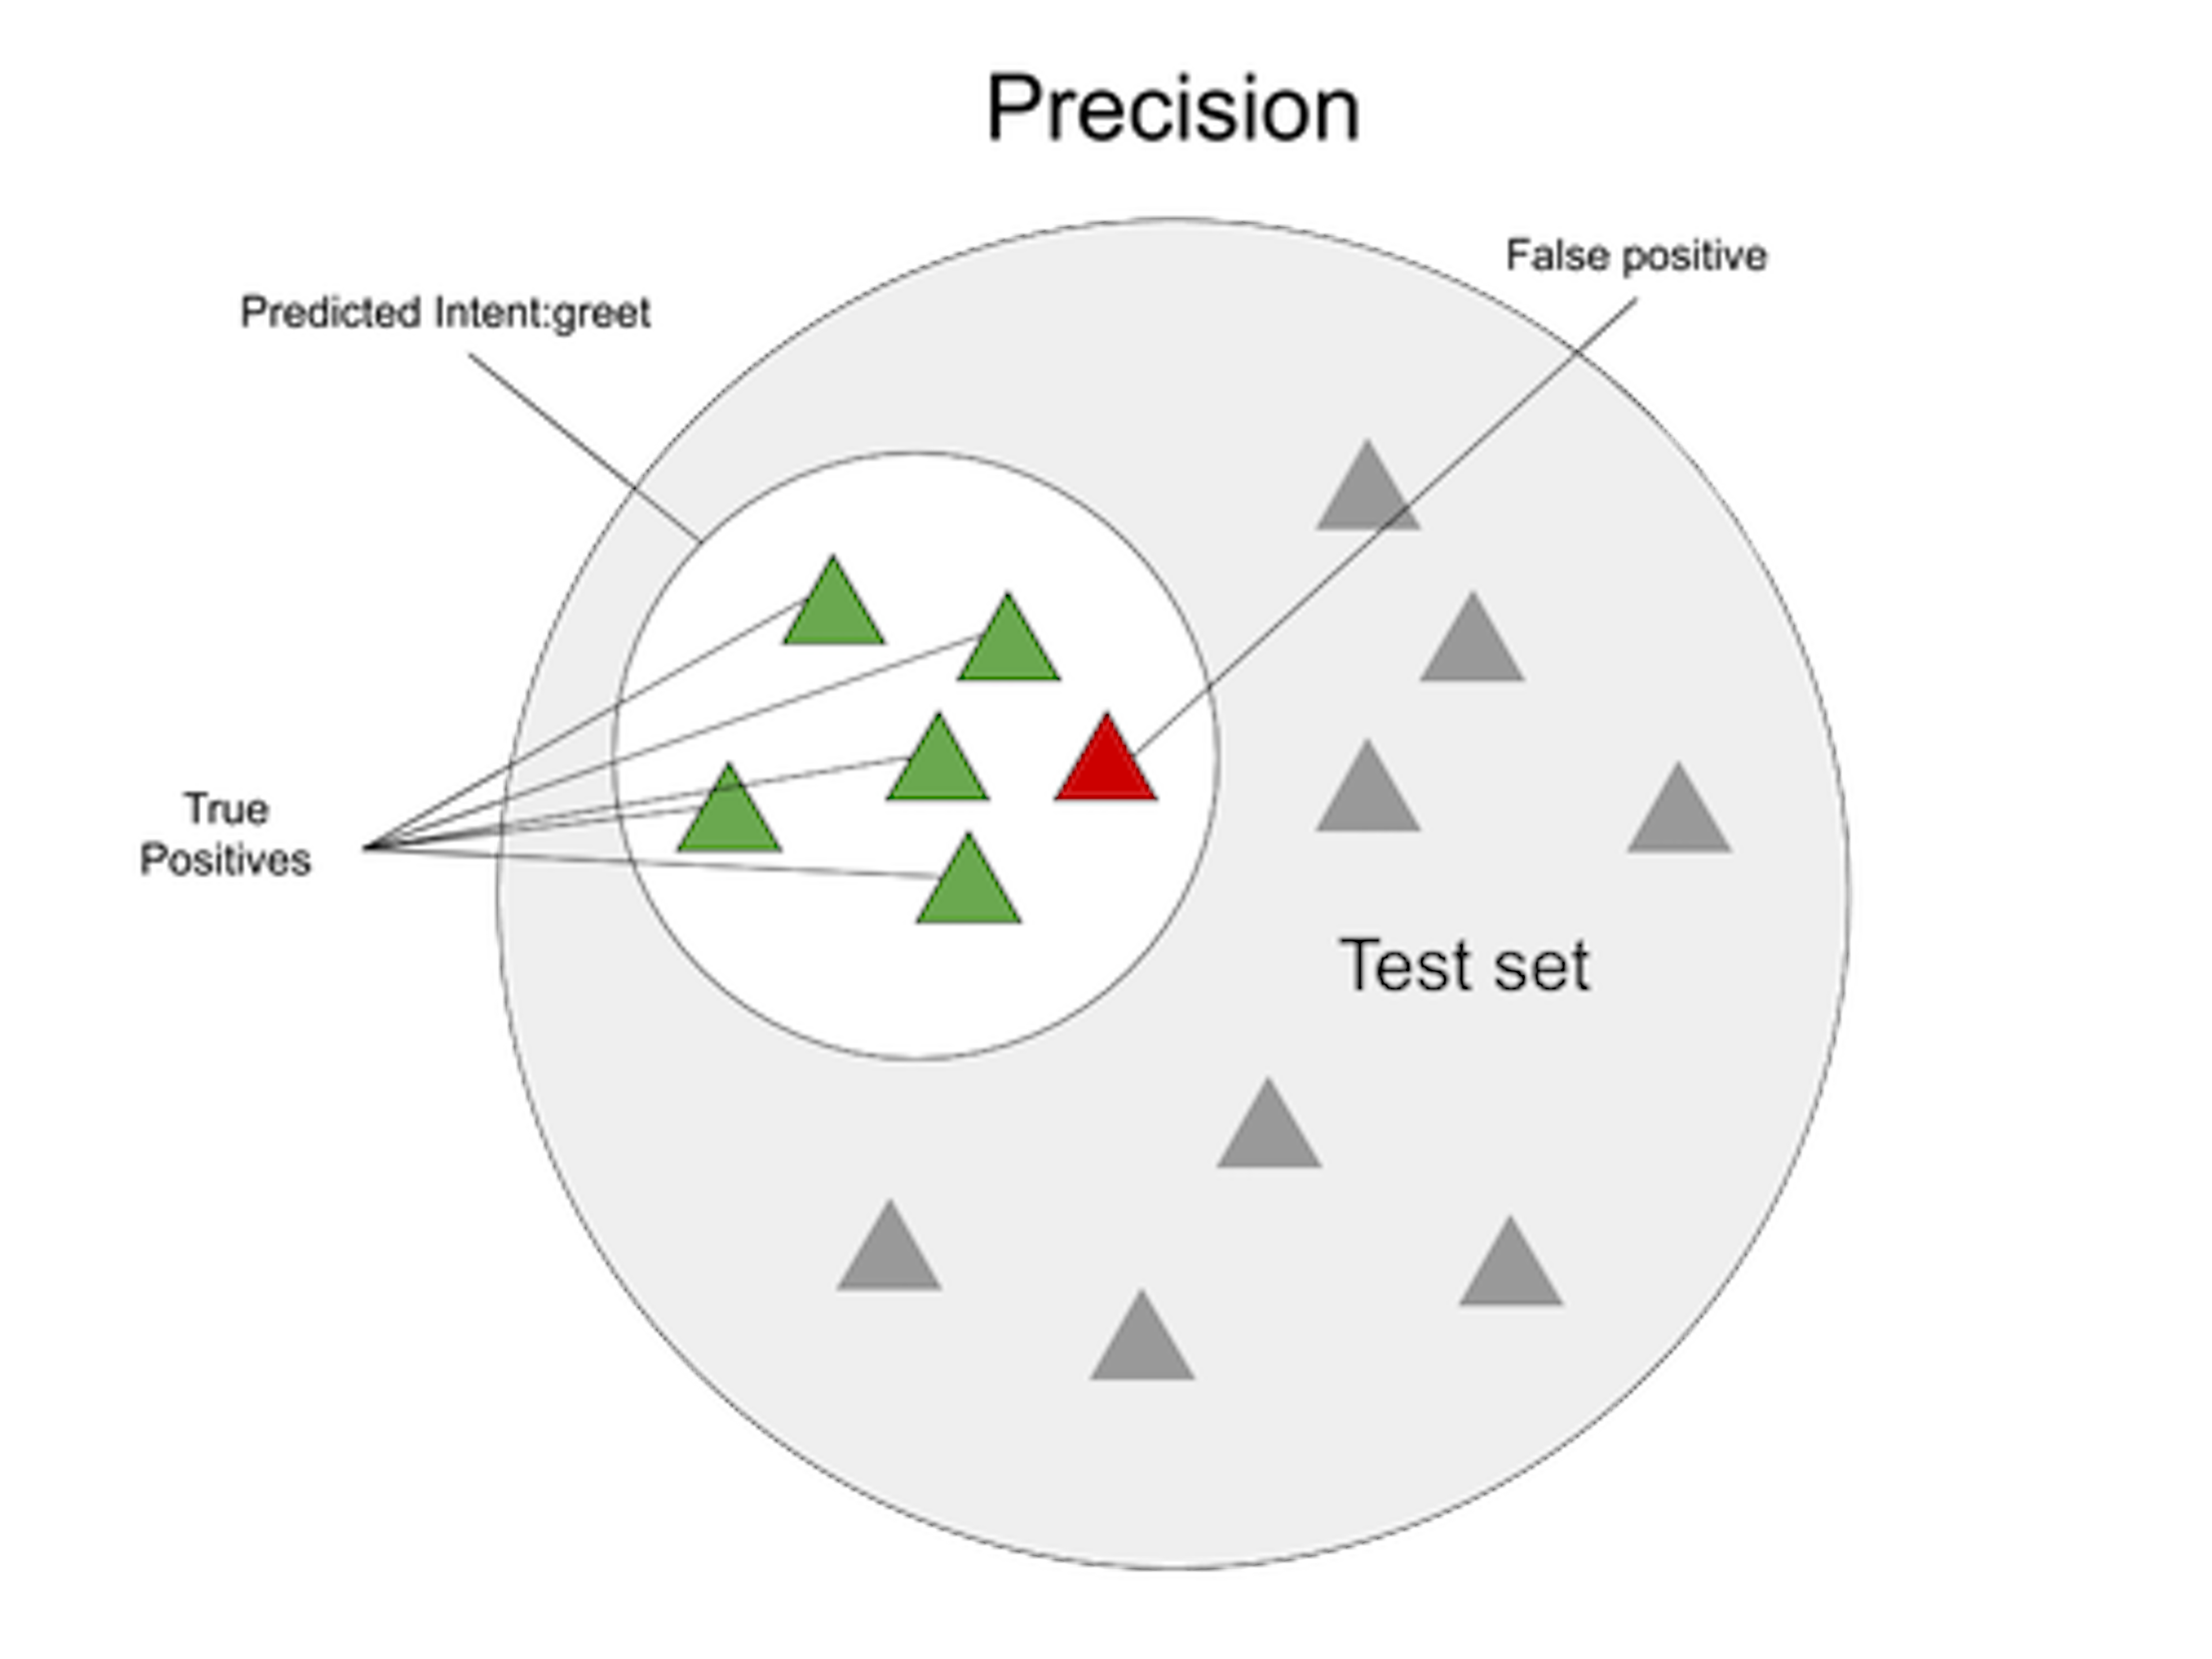
Precision looks at all of the messages the model identified as intent:greet and measures how many actually were intent:greet. The group of user messages the model identified as intent:greet includes both true positives (predictions that were correct), and maybe also some false positives (messages that were classified as greet when they're really something else). To get precision, we divide the number of true positives by the combined number of true positives and false positives.
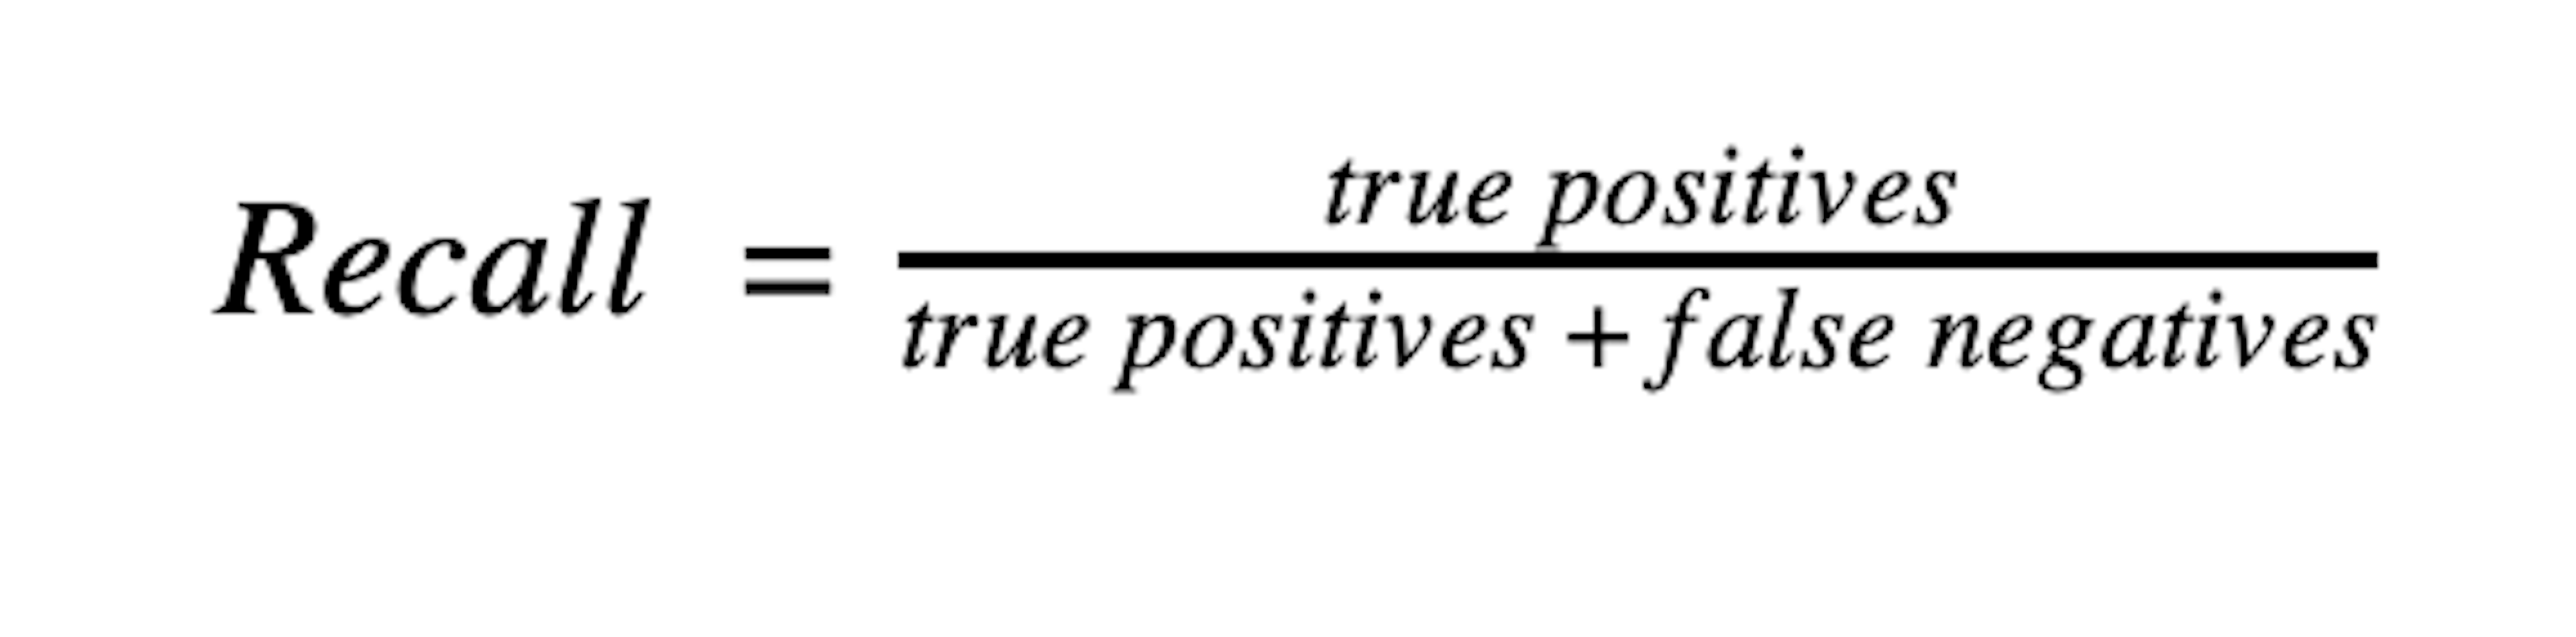
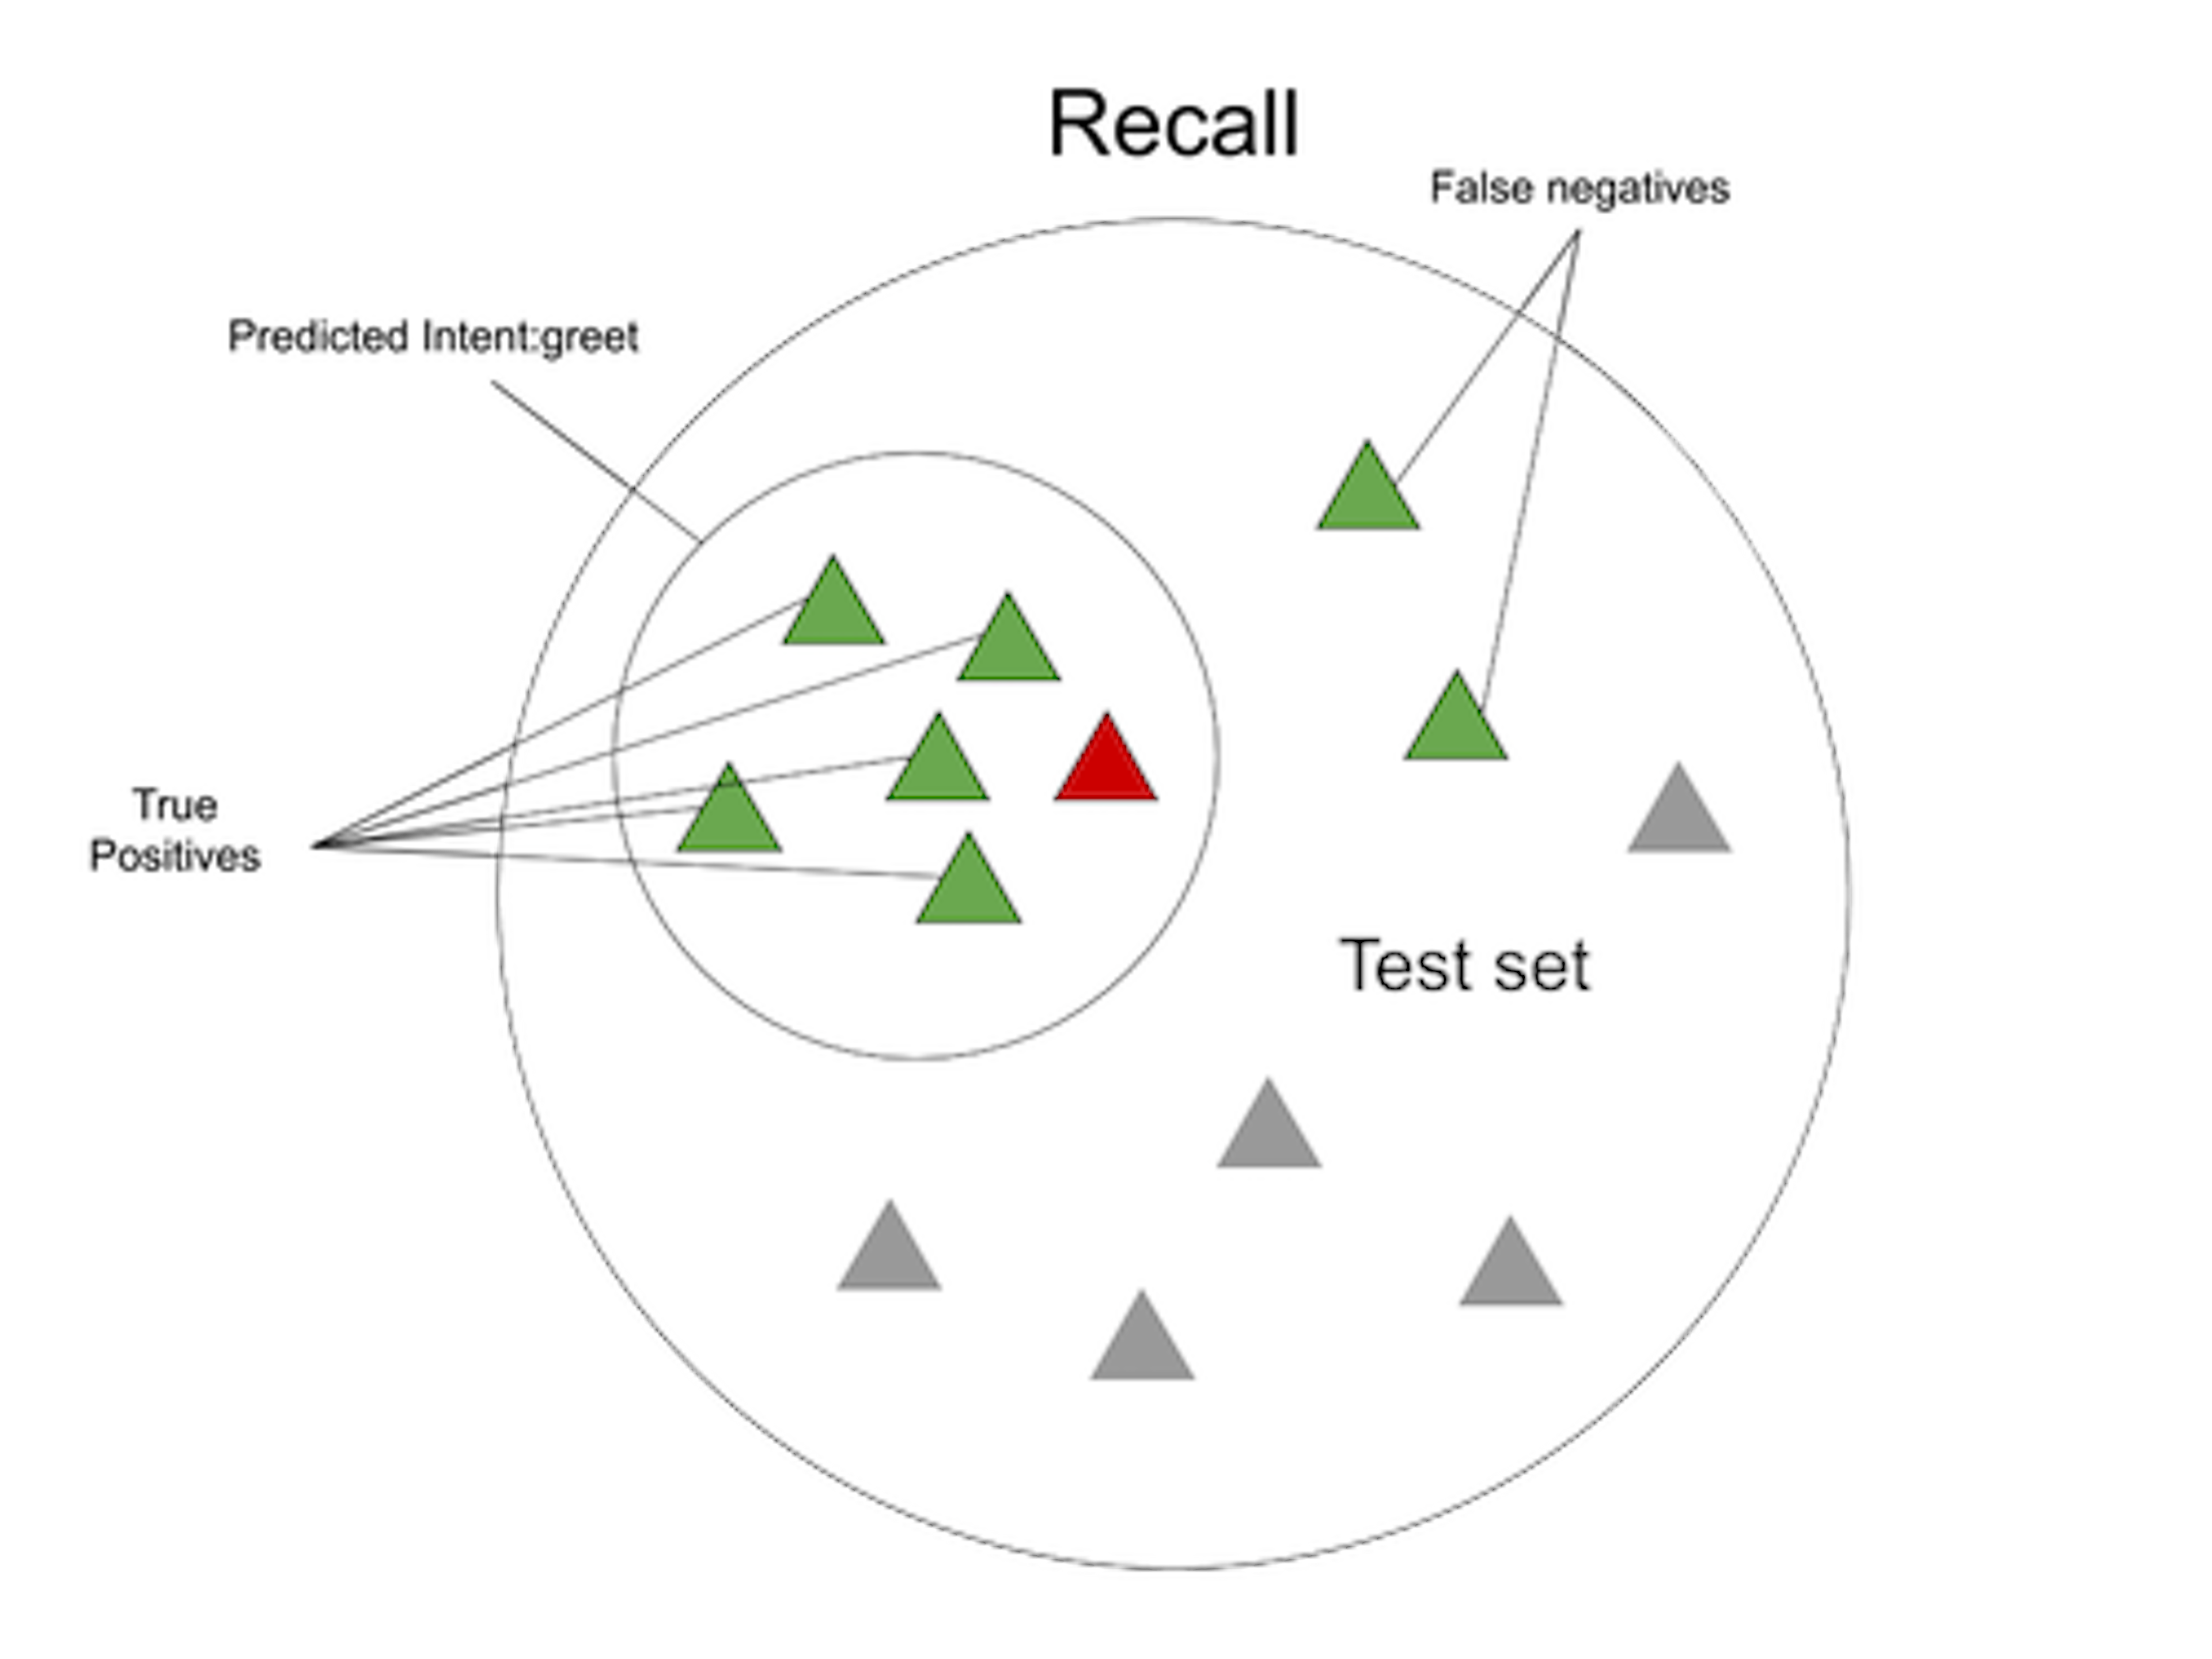
Recall, on the other hand, looks at the total number of user messages in the test set that actually were intent:greet and measures what fraction were correctly classified intent:greet. We find the total number of intent:greet messages by counting both the true positives, the ones the model got right, and the false negatives, the ones the model didn't predict intent:greet when they really were. To get the recall, we divide the number of messages correctly classified as intent:greet (the true positives) and divide it by the combined number of true positives and false negatives.
The F₁ score is calculated by taking the harmonic mean of precision and recall. We won't go into detail about the formula here, but check out this resource to learn more about the mathematics behind the F₁ score. The important thing to keep in mind (for the purposes of this blog post) is that F₁ measures the accuracy of the model, taking both precision and recall into account in equal priority.
Confusion Matrix
A confusion matrix is a grid that illustrates how often a model made a correct classification. Along the horizontal axis, you have the intent the model predicted. Along the vertical axis you have the actual intent. Where the two connect diagonally down the grid, you have the number of true positives, or correct classifications. You'll see a simplified version of the confusion matrix print to your terminal when you run the NLU evaluation.
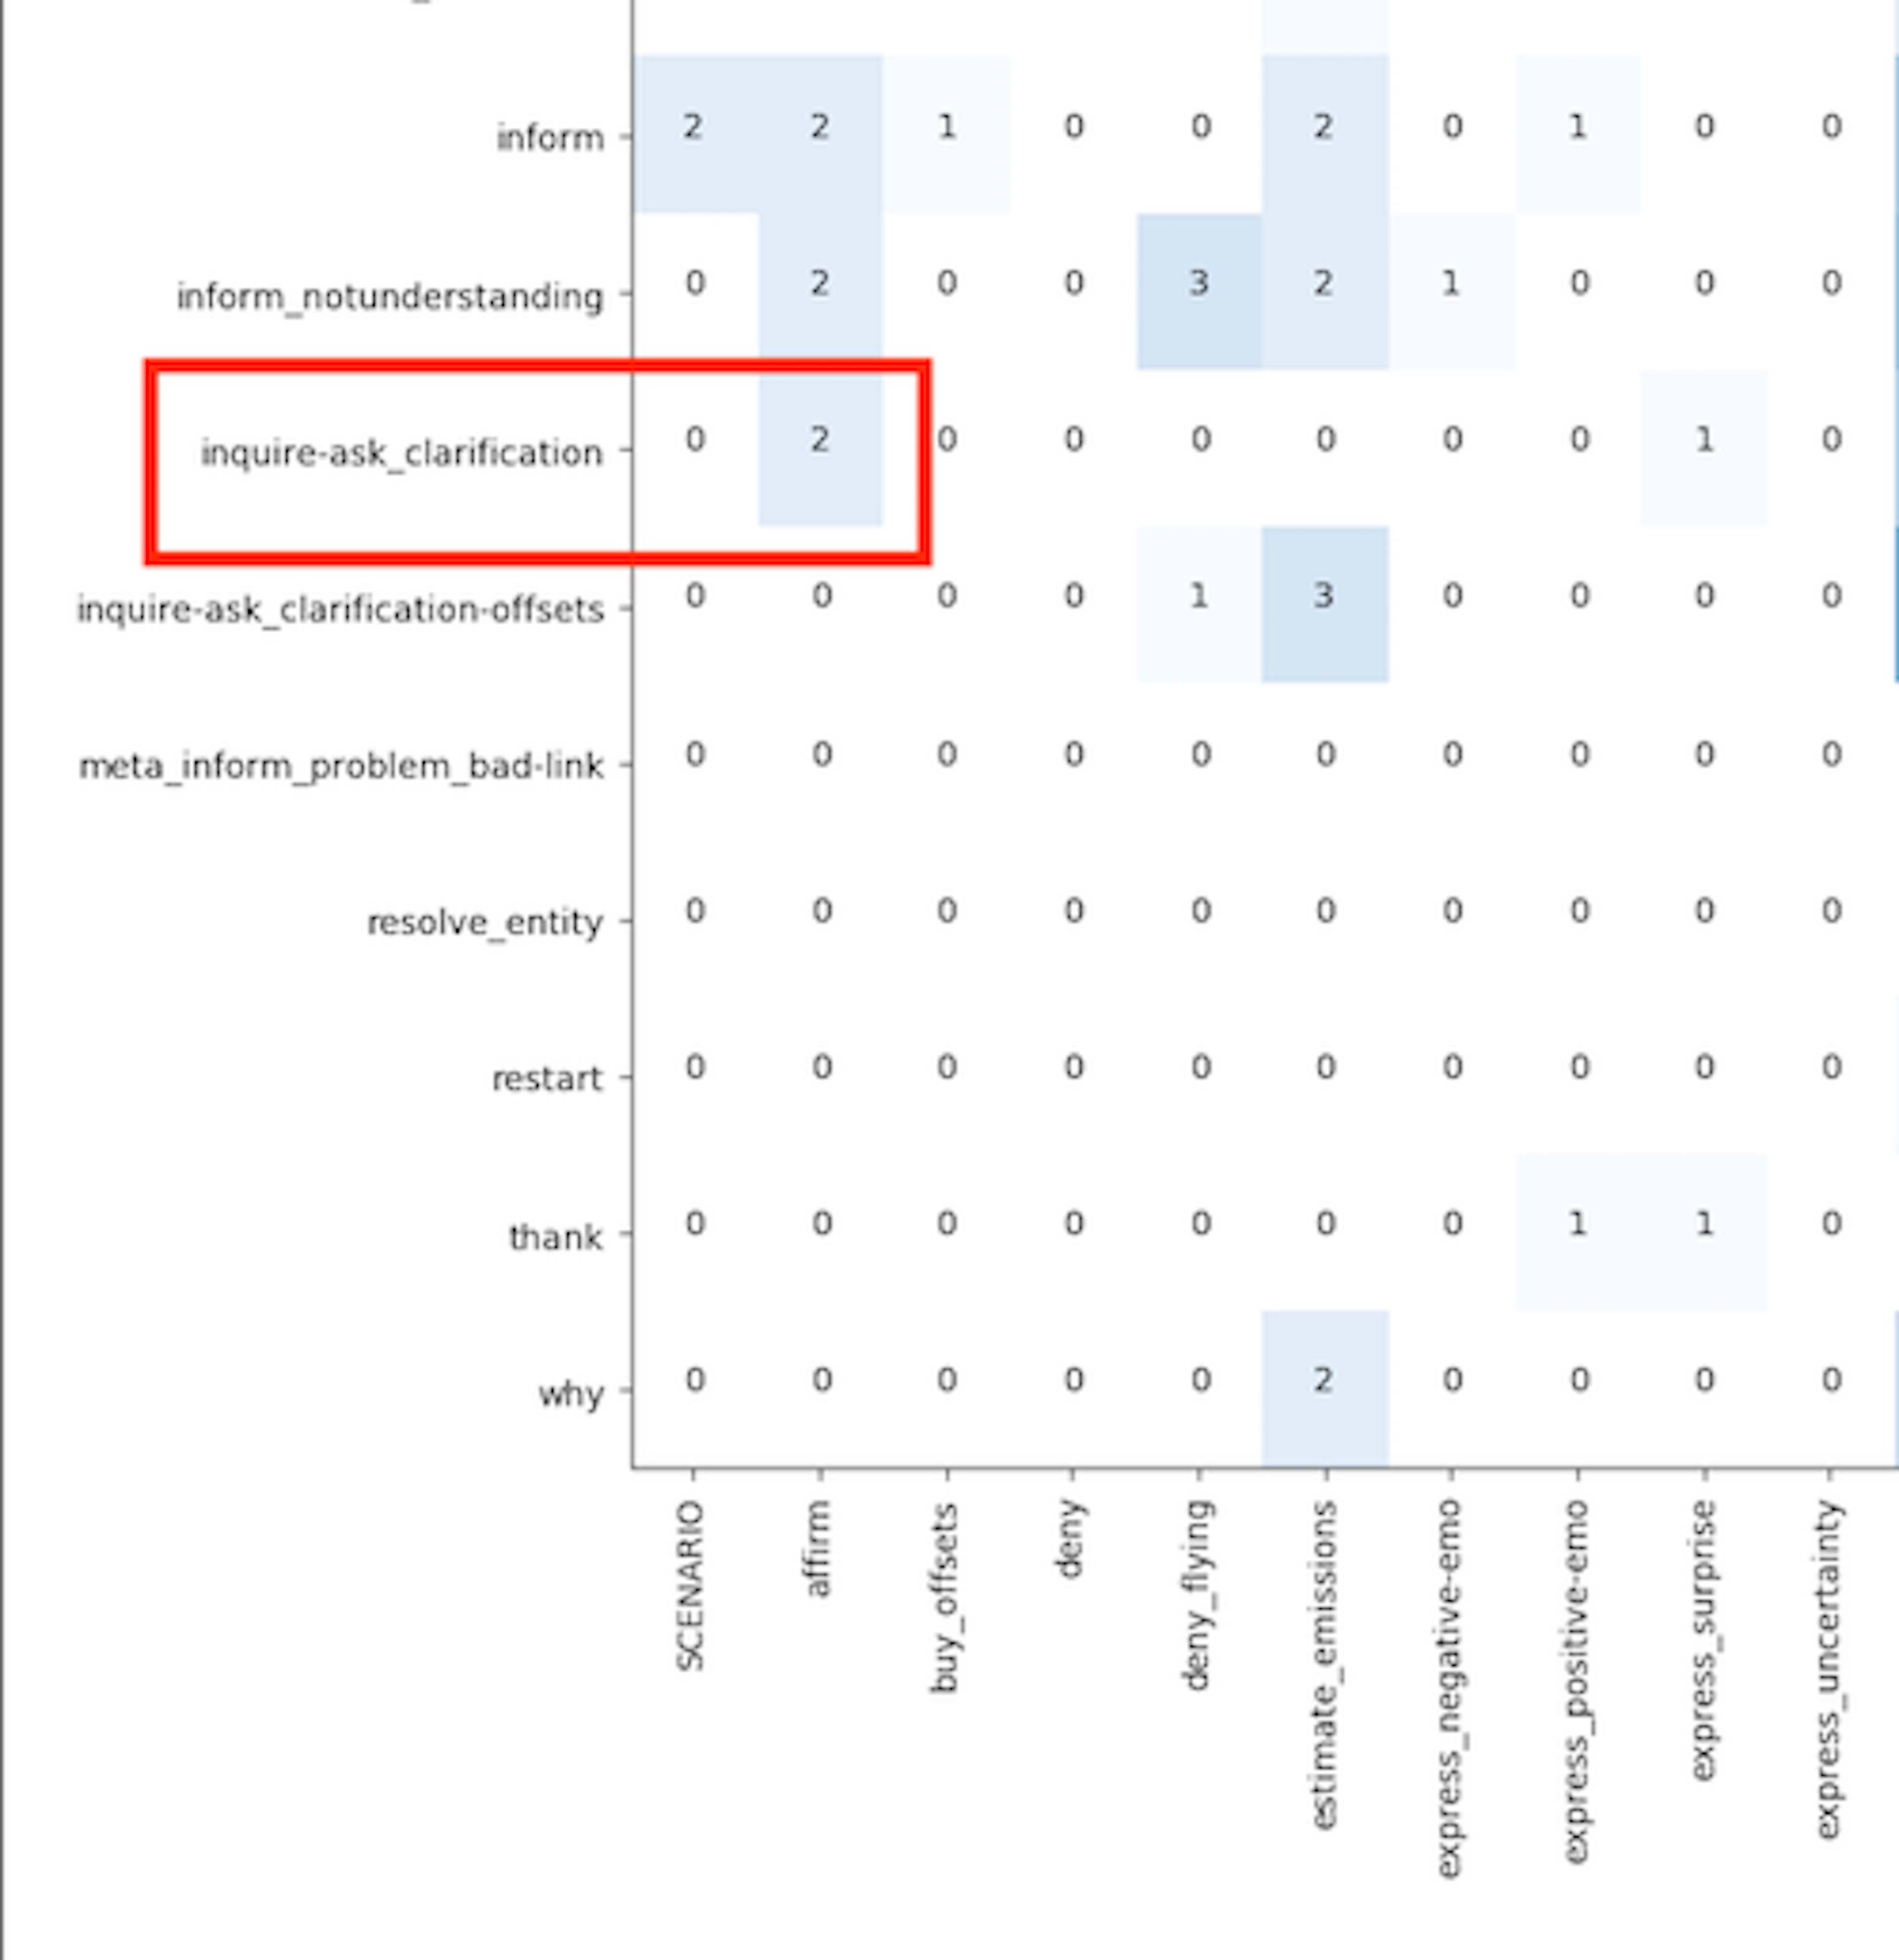
A more detailed confusion matrix (one with intents labeled on the X and Y axis) is generated during testing and saved to the /results directory in your project files:
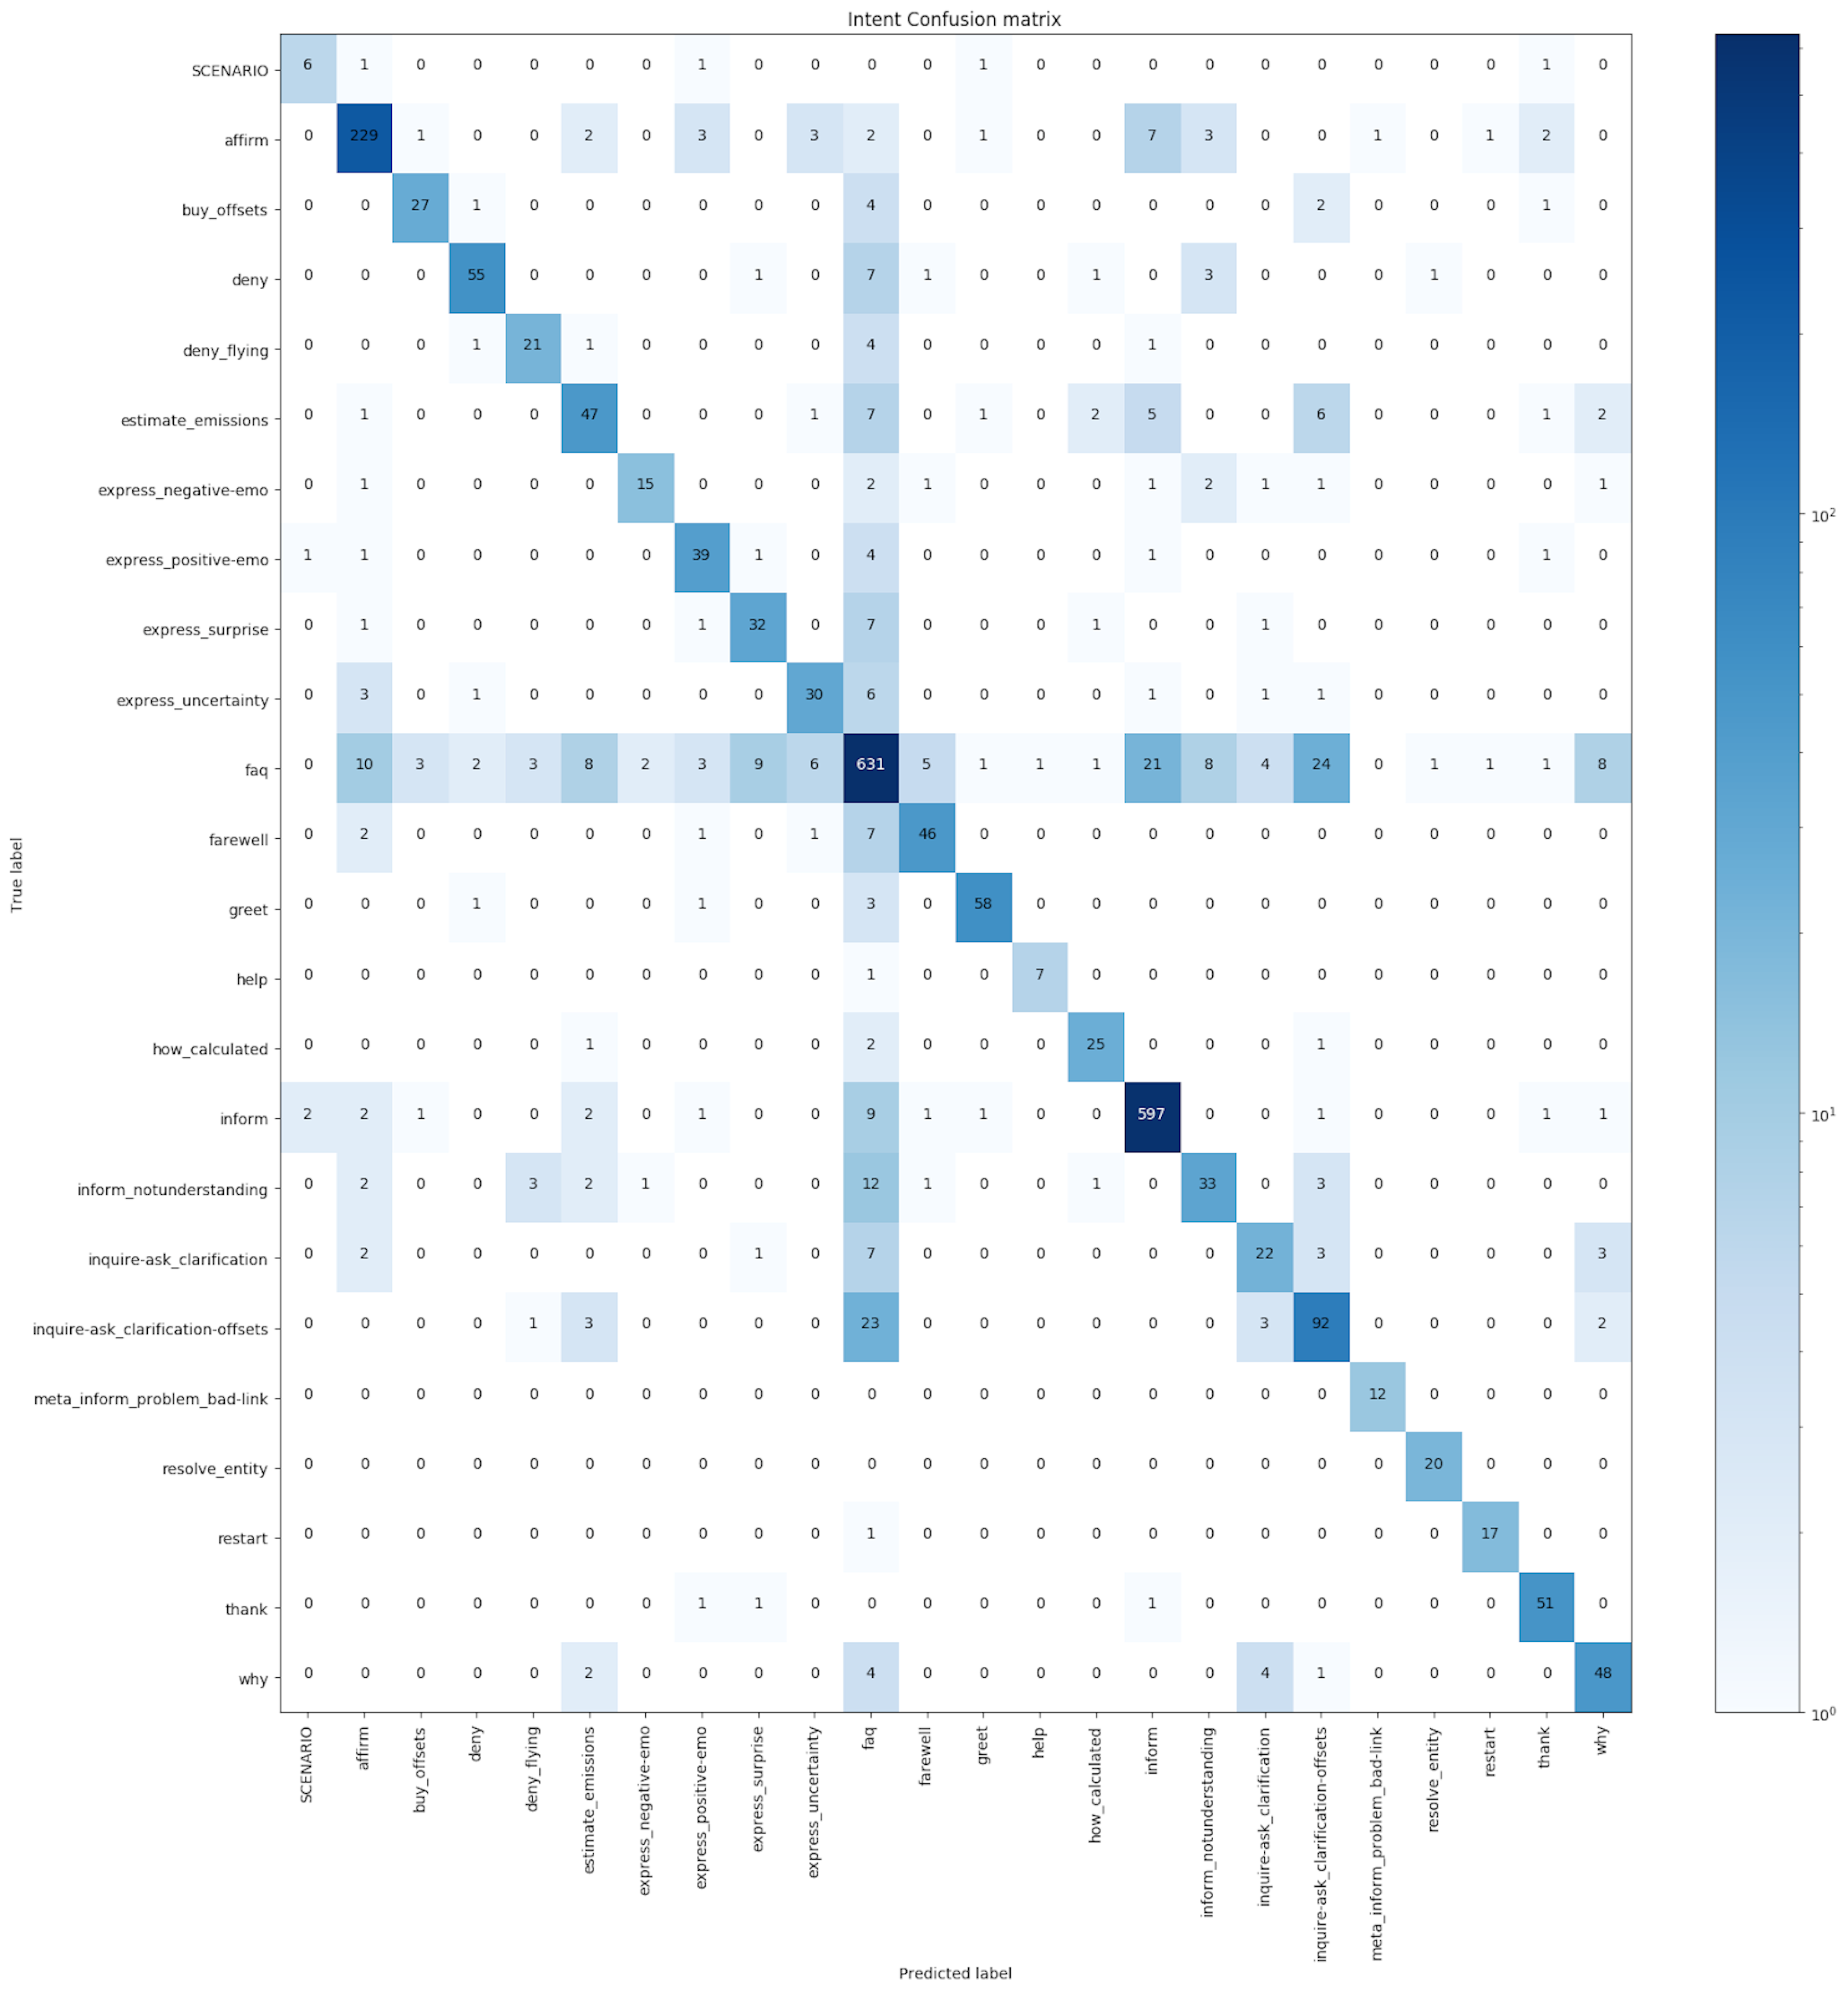
Taking a closer look at the graph, we can see which intents the model is mistaking for others. For example, here we see the inquire-ask_clarification intent was misclassified as affirm 2 times.
Confidence histogram
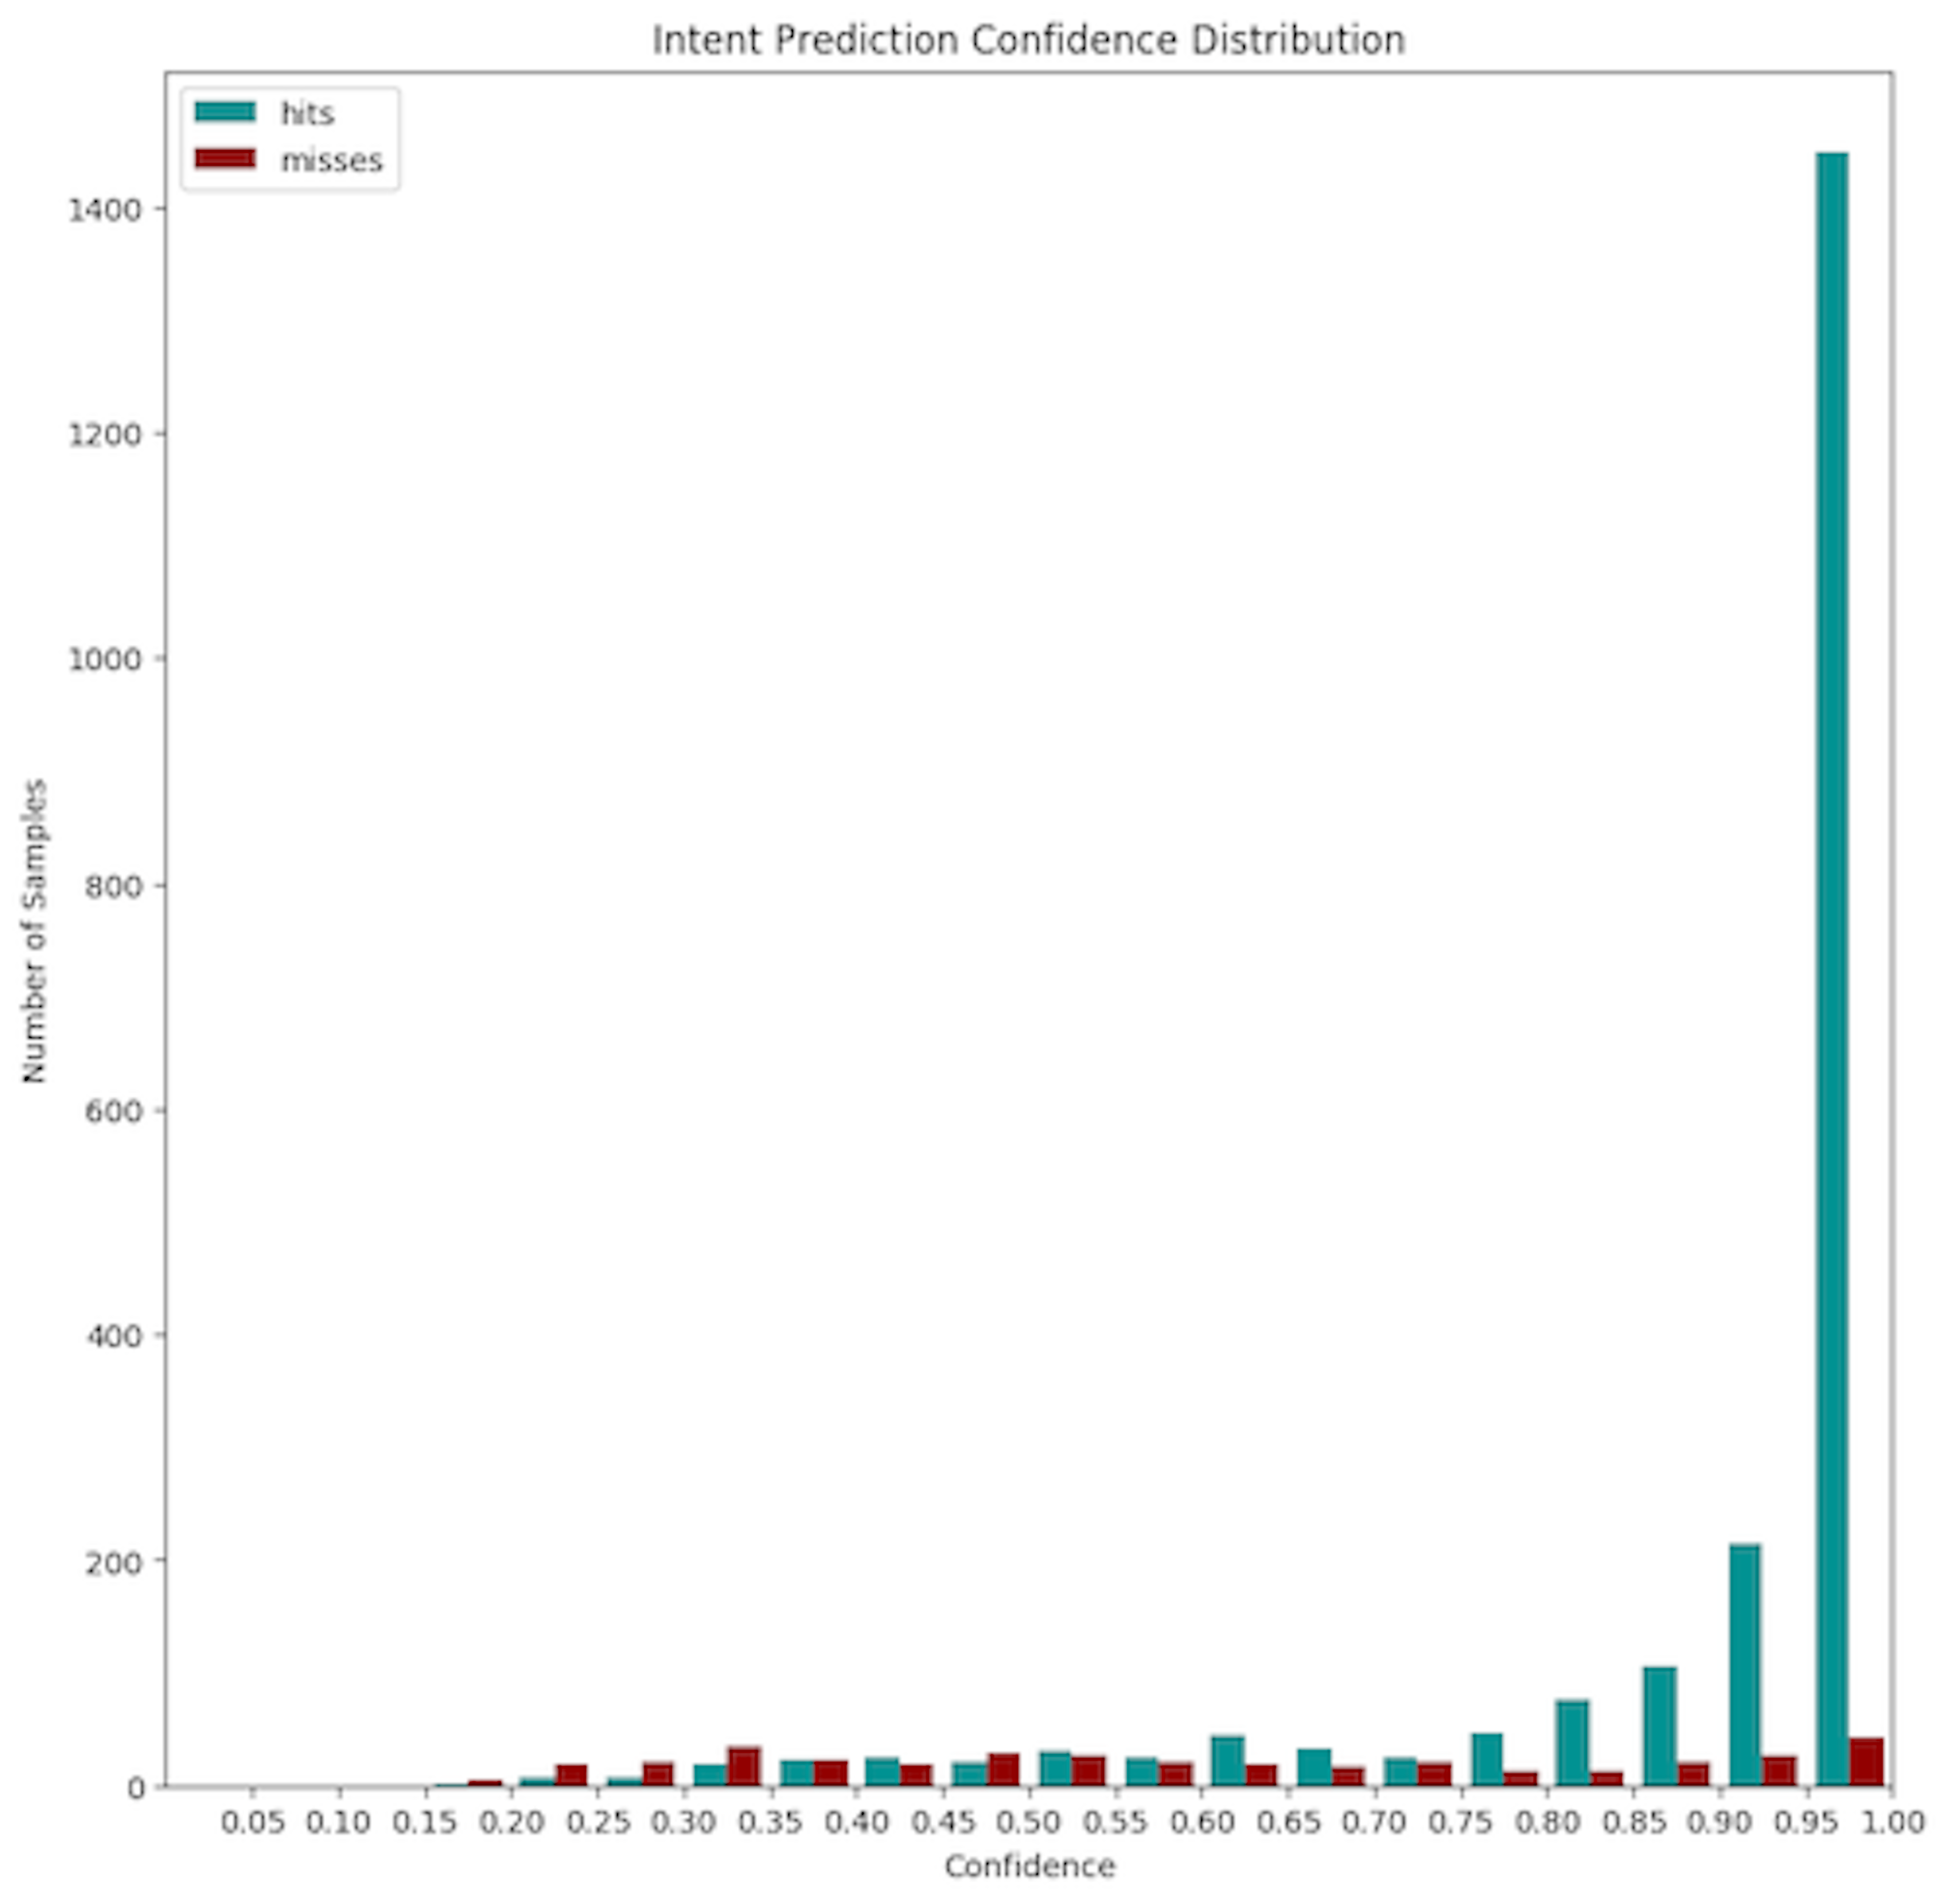
The confidence histogram charts the model's confidence for both correct and incorrect classifications. In the example shown below, we see blue bars indicating intents that were predicted correctly, and we also see the model had fairly high confidence when making those predictions. Misses are indicated by red bars.
While an ideal model would have no misses, this isn't always attainable. Over time, as we improve our training data, we would want to see red bars start to cluster along the left hand side of the graph, indicating lower confidence for misses. When you can correlate low confidence with the likelihood of a missed prediction, you can set an NLU confidence threshold to help you handle cases where the model is less confident about the prediction, for example, by asking the user to rephrase their statement.
Testing and CI/CD
A CI/CD workflow is often called a pipeline because it consists of a sequence of actions that flow in one direction. The purpose is to move new code changes from your Git server to a production or staging environment. Along the way, you can run tests and review changes to make sure updates work as intended.
Many code hosting platforms, including GitHub, Bitbucket, Azure Devops and others, have some kind of CI/CD functionality built in. You can also use tools built specifically for CI/CD like CircleCI, Travis, or Jenkins. No matter which tool you use, the principle is generally the same. First you define the trigger event that should set the pipeline in motion. For example, when a commit is pushed or when a pull request is opened. Then, in the pipeline's YAML file, you specify the sequence of steps that should run in order to build the application, test, and deploy.
Let's look at an example, and step through the pipeline. This example uses GitHub Actions, and you can find the full code here.
GitHub Actions execute in a runner, a virtual machine hosted by GitHub. Alternatively, you can run your CI/CD pipeline in a Docker container, which is defined by a Docker image. You can think of a Docker image as a recipe for creating the runtime environment your application requires. Here, we're specifying a runner that uses the latest version of Ubuntu and installing a supported version of Python, 3.7. Each time the pipeline runs, it spins up a fresh new VM or container.
name: Model CIon: [push]
jobs:  build-model:    name: Build, test, and upload model    runs-on: ubuntu-latest    steps:    - uses: actions/checkout@v1    - name: Set up Python 3.7      uses: actions/setup-python@v1      with:        python-version: 3.7
Then, in the next pipeline step, we install our dependencies, which include Rasa.
- name: Install dependencies run: | python -m pip install --upgrade pip pip install -r requirements.txtThe pipeline YAML file works just like a bash script. It runs any command you could run from your terminal, automatically and in sequence. Before we start running tests, we need to run the Rasa CLI command `rasa train`, to build a model based on the latest version of our data.
- name: Train model run: | rasa trainNext, we run a few testing steps on the new model. In this example, we're running end-to-end tests and evaluating the NLU test using cross validation. Note that we're using the --fail-on-prediction-errors flag, which allows you to make the pipeline step fail automatically if one of the test stories fails. The output of these tests is in JSON, but we want something a bit friendlier to read, so we're passing the JSON to a Python script located in the same repository to format the results into a nice table.
- name: Run Through Test Stories run: | rasa test --stories test_stories/stories.md --fail-on-prediction-errors- name: Cross-validate NLU model run: | rasa test nlu -f 5 --cross-validation python format_results.pyIn this example, we want a human to review the test results before deciding to merge. So we run a GitHub Action that posts the results of the tests to the pull request, where a team member can manually look them over before merging. In other cases, you might want to automatically merge changes if test results fall within a certain threshold.
- name: post cross-val results to PR uses: amn41/comment-on-pr@comment-file-contents continue-on-error: true env: GITHUB_TOKEN: ${{ secrets.GITHUB_TOKEN }} with: msg: results.mdAn artifact is a file that's created by the pipeline process-in this case, the model we trained. As a final step, we upload this artifact to a /models directory whose location is specified in the Action. Alternatively, you could send a cURL request to upload the model to Rasa X.
- name: Upload model if: github.ref == 'refs/heads/master' uses: actions/upload-artifact@master with: name: model path: modelsConclusion
Testing needn't be all or nothing to have a big impact on your development-you can start by automating a few tests like the ones we've discussed here and work your way up to full test coverage for your assistant. Along the way, you'll gain confidence that new models perform the way you expect and improve over time.
As a next step, check out these additional resources on testing your assistant, and let us know how you're thinking about testing-by sharing your experience in the forum or tweeting @Rasa_HQ.
- Model Testing and CI for conversational Software (Rasa blog)
- Testing Your Assistant (Rasa docs)
- Setting up CI/CD (Rasa docs)
- How Rasa's Research Team Uses Rasa X to Build Carbon Bot (webinar)